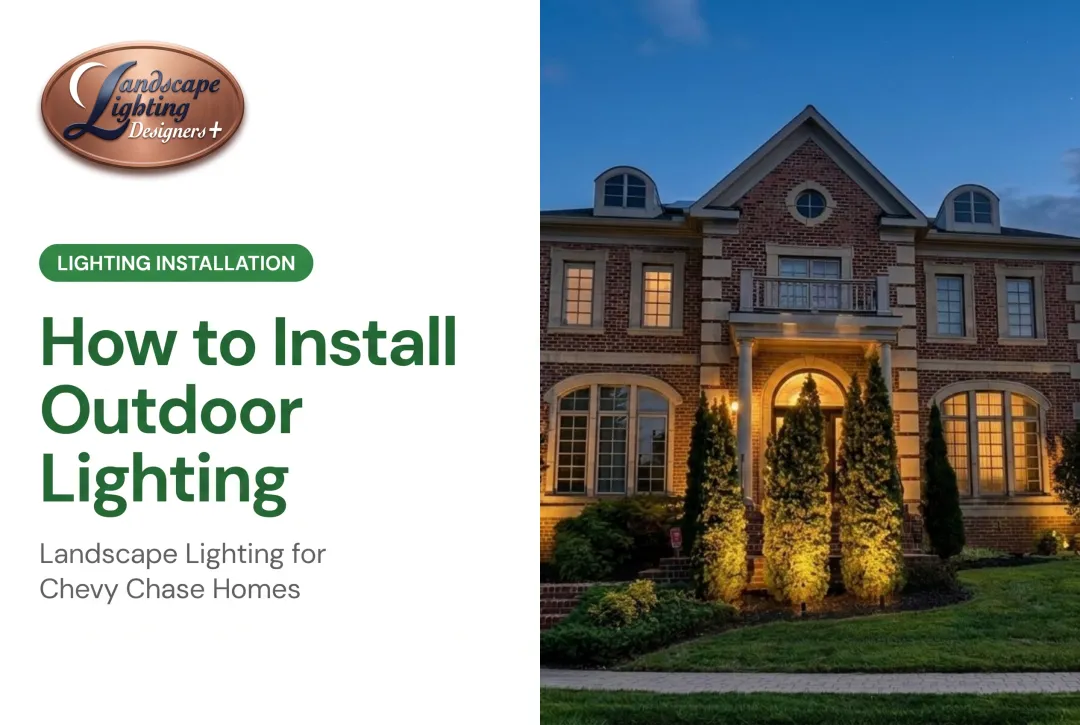
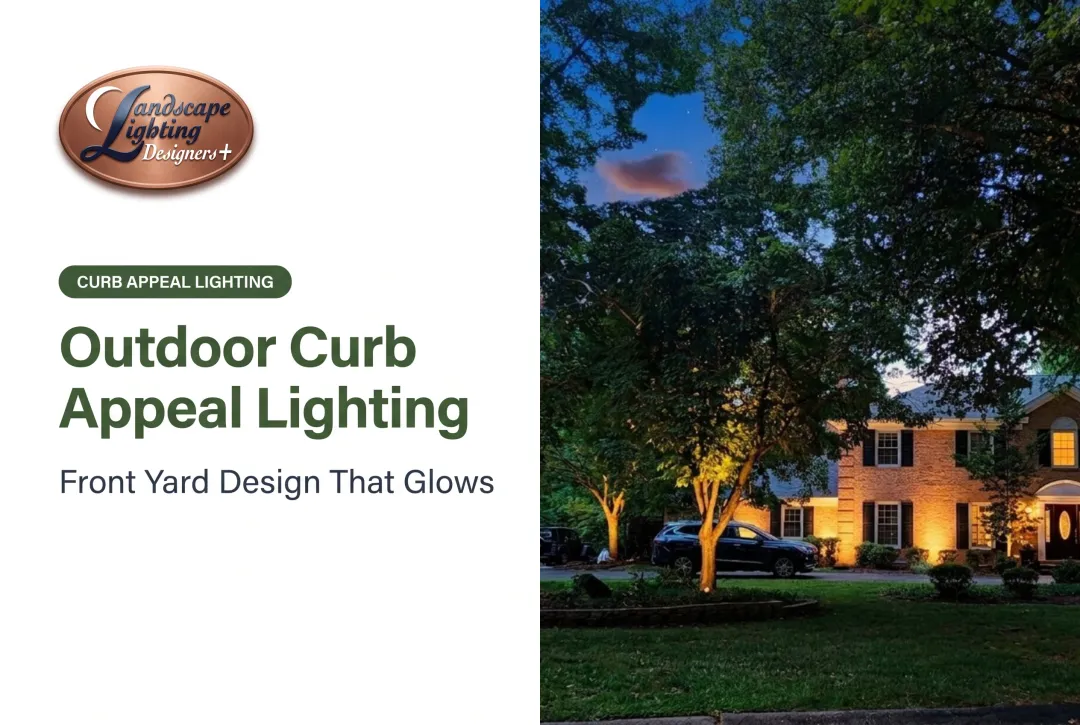
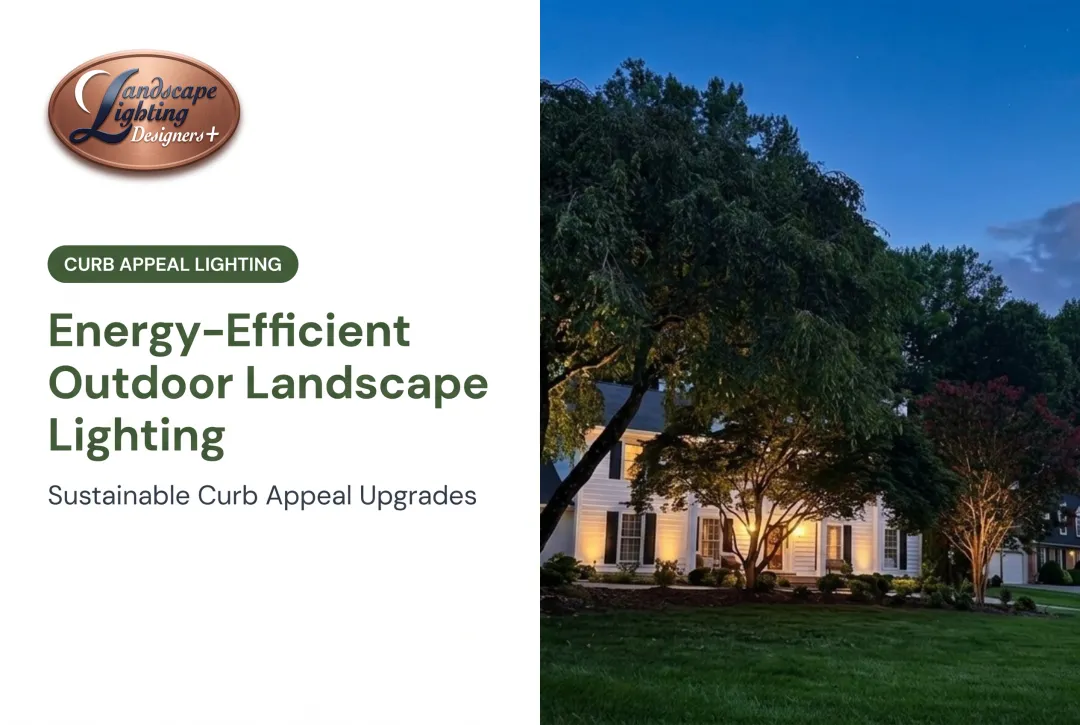
Professional outdoor lighting extends far beyond basic illumination. It enhances architectural details like brick facades, stone columns, and decorative cornices. It showcases specimen trees, garden beds, and water features. And it adds both perceived value and practical safety by illuminating pathways, stairs, and entry points.
In this guide, you'll learn how residential landscape lighting systems work, what fixture types serve which purposes, how professional designers layer ambient, task, and accent lighting for depth and drama, and when expert guidance delivers results that DIY kits simply can't match.
Key Takeaways
- Professional outdoor lighting boosts curb appeal and makes outdoor spaces safer after dark
- Low-voltage 12V systems are the safe, energy-efficient standard for homes
- Layered ambient, task, and accent lighting adds depth and visual interest
- Quality LED fixtures last 15–20 years with minimal maintenance
- Owner-operated designers tailor custom plans to your home and landscape
Understanding Outdoor Lighting Systems: Low-Voltage vs. Line Voltage
What is Low-Voltage Landscape Lighting?
Low-voltage landscape lighting operates at 12 volts, stepped down from your home's standard 120V current through a transformer. The transformer mounts at least 12 inches above grade and connects to weatherproof two-wire cable that runs to individual fixtures throughout your property.
Why 12V is the residential standard:
- Minimal shock risk around children, pets, and wet conditions
- Fixtures you can reposition or add without major electrical work
- LED fixtures that use far less power than line-voltage alternatives
- Installation that typically does not require a licensed electrician
- UL 1838-listed professional systems that meet nationally recognized safety standards
Those strengths are why low-voltage is the professional standard for homes throughout the DC metro area.
What is Line Voltage Lighting?
Line voltage systems operate at 120 volts, the same as your household outlets, and require licensed electrical installation, conduit burial, and building permits in most jurisdictions.
When 120V might be appropriate:
- Large commercial properties requiring high-intensity illumination
- Very large estates with fixtures located hundreds of feet from power sources
- Special applications needing substantially more power than 12V can deliver
Trade-offs vs. low-voltage:
- Higher installation cost due to professional electrical work and permitting
- Greater shock risk requires careful installation and maintenance
- Less flexibility for future adjustments
- Higher operating costs
For typical residential properties in Bethesda, Potomac, Chevy Chase, and Washington DC, 12V low-voltage systems deliver the best combination of safety, flexibility, performance, and cost.
Essential Components of a Low-Voltage System
Once you choose low-voltage, three parts determine how well the system performs.
Transformer: The transformer steps household 120V power down to safe 12V current. Size it by calculating total fixture wattage (VA), then add capacity for future expansion. Modern units include built-in timers or photocells that turn lights on at dusk and off at dawn.
Cable: Properly sized cable prevents voltage drop that dims distant fixtures. Manufacturers typically recommend 12 AWG (American Wire Gauge) for runs under 100 feet, with 10 or even 8 AWG for longer runs or higher loads. Bury cable at least 6 inches deep for protection.
Fixtures and bulbs: Quality fixtures house outdoor-rated LED bulbs in weather-resistant housings that protect components from moisture, temperature swings, and physical damage.
Voltage drop is the loss of electrical pressure as current travels through wire. Fixtures farthest from the transformer receive lower voltage, so they can dim or fail to light properly.
How to prevent voltage drop issues:
- Calculate voltage drop for each cable run using the formula:
(2 × cable length × total run VA) ÷ cable constant - Ensure end-of-run voltage stays above 10V (fixtures typically operate in the 10-15V range)
- Use larger wire gauge (10 or 8 AWG) for long runs
- Split loads across multiple circuits
- Consider T-layout or hub-system designs that distribute power more evenly
Professional designers calculate voltage drop during planning so brightness stays even across every fixture.

Types of Outdoor Lighting Fixtures and Their Applications
Each fixture type does a different job outdoors. Matching the right light to walkways, trees, walls, and steps is what turns a dark yard into a balanced, usable nightscape.
Path Lights and Garden Lights
Path lights guide visitors along walkways, driveways, and garden paths while adding visual interest to planting beds.
Placement best practices:
- Space fixtures 8-10 feet apart for continuous illumination
- Stagger lights on alternating sides for a natural, layered look
- Use low-glare designs that illuminate the ground without shining into eyes
- Blend fixtures into landscaping to keep hardware unobtrusive
Applications:
- Front walkways and garden paths
- Driveway edges and stairways
- Patio perimeters
Spotlights and Bullet Lights
Focused-beam fixtures highlight specific features like tree trunks, architectural details, sculptures, and ornamental plantings.
Beam spread options:
- Narrow (10-25°): Precise highlighting of columns, tree trunks, statues
- Medium (35-60°): Broader coverage for small to medium trees, shrubs, facade sections
- Flood (60-90°): Wide illumination for large tree canopies, entire wall sections
Placement guidance:
- Position 3-4 feet from the subject for dramatic contrast
- Move to 8-10 feet for softer, more diffuse effect
- Angle upward to reveal bark texture and branch structure on trees
Well Lights
Well lights install flush with the ground in waterproof housings, creating strong uplighting while staying low-profile and out of sight.
Ideal applications:
- Uplighting tree canopies from directly below the trunk
- Grazing textured walls to reveal stone or brick patterns
- Highlighting ornamental grasses, shrubs, and architectural plants
- Illuminating flag poles, columns, or vertical garden features
Key specifications: Look for IP67 or IP68 rated fixtures with sealed moisture-blocking connectors for in-ground durability.
Wash Lights
Wash lights create soft, even illumination across flat surfaces without harsh shadows or bright spots.
Best uses:
- Home facades and garage doors
- Privacy fences and decorative screens
- Retaining walls and raised planters
- Background surfaces for silhouette effects
Installation tip: Space fixtures 3-4 feet apart, positioned 12-18 inches from the surface, to achieve uniform coverage without visible bright or dark patches.
Downlights (Moonlighting)
Downlights mount in trees, pergolas, or eaves and cast gentle illumination downward, mimicking natural moonlight filtering through branches.
Why moonlighting works:
- Creates natural, subtle ambiance rather than harsh artificial light
- Illuminates lawns, patios, and outdoor living spaces from above
- Highlights tree canopy structure and creates interesting shadow patterns
- Provides functional light for entertaining without visible fixtures
Installation requirements: Mount fixtures 20-30 feet high in mature trees or structures. Use durable brass or copper housings built for tree installs, paired with weather-resistant LED bulbs.
Step Lights and Hardscape Fixtures
Recessed or surface-mounted fixtures light stairs, retaining walls, and raised patios so edges read clearly after dark and trip hazards drop.
Installation options:
- Flush-mount: Installed during new construction, recessed into walls or stair risers
- Surface-mount: Retrofit for existing hardscapes, attached to vertical surfaces
Outdoor Lighting Design Techniques That Transform Landscapes

The Three-Layer Lighting Approach
Professional designers balance three distinct lighting layers:
1. Ambient lighting provides overall illumination for large areas like patios, lawns, and entertaining spaces. It sets the baseline visibility level.
2. Task lighting focuses on functional needs: stairs, walkways, outdoor kitchen areas, and entry points where safe movement matters most.
3. Accent lighting highlights focal points like specimen trees, water features, architectural details, and sculptures that deserve special attention.
Used together, the three layers add depth, keep paths and steps safe, and pull the eye toward the features you want noticed after dark.

Uplighting for Drama and Dimension
Uplighting turns trees and architectural details into clear nighttime focal points by lighting them from below.
Technique:
- Place fixtures 2-3 feet from tree trunks
- Angle upward to reveal bark texture and branch structure
- Use narrow beams (10-15°) for tall trunks, wider beams (35-60°) for canopies
- Illuminate both trunk and canopy to avoid the "floating tree" effect
Fixture guidance by tree size:
- Small trees under 20 feet: usually one 35° fixture
- Medium trees: two fixtures, or one 60° flood
- Large mature trees: multiple fixtures with mixed beam spreads for trunk, lower canopy, and upper canopy
Silhouetting and Shadowing Effects
Silhouetting and shadowing work by placing light behind or in front of an object so form reads clearly at night.
Silhouetting: Place a strong light source between the subject (ornamental grass, sculpture, architectural element) and a backdrop wall or fence 4-6 feet away. The subject appears as a dark silhouette against an illuminated background.
Shadowing: Position the fixture in front of a plant or object with an interesting shape, casting its shadow onto a tall, flat backdrop behind it. The cast shadow emphasizes shape and adds depth on the surface behind it.
Wall Washing and Grazing Techniques
Wall washing creates uniform light across a surface to emphasize flatness and color, ideal for smooth stucco, painted surfaces, or clean modern facades.
Wall grazing positions fixtures very close to textured surfaces (12-18 inches away), angled to skim across the surface and reveal texture in stone, brick, stacked slate, or rough stucco.
Spacing: Place fixtures 3-4 feet apart for even coverage without dark gaps or hot spots.
Both approaches suit home facades, columns, outdoor fireplaces, and garden walls—choose washing for smooth planes and grazing when you want texture to stand out.

Browsing finished work is the quickest way to narrow a direction; our project gallery has installations from across Bethesda, Potomac, and Chevy Chase.
Planning Your Outdoor Lighting Design for DC Metro Homes
Assessing Your Property's Unique Features
Before placing a single fixture, create a mental or physical map of your property:
- Architecture: Note columns, cornices, brick or stone details, entry features
- Mature trees: Identify specimens worth highlighting: Japanese maples, oaks, dogwoods
- Pathways: Map all walkways, driveways, and garden paths that need illumination
- Entertaining areas: Locate patios, decks, fire pits, outdoor kitchens, pool areas
- Focal points: Flag water features, sculptures, specimen plantings, architectural walls
Federal townhomes, Victorian properties, Georgian row houses, and contemporary designs each need different fixture styles and placement. Historic homes usually call for concealed fixtures and subtle light that respects original character.
Deciduous trees also change from bare winter branches to full summer canopy, so plan lighting that still works year-round.
Designing for Balance and Restraint
Once you know what the property offers, resist the urge to light all of it. Selective illumination creates more drama than washing every surface.
Practical guidelines:
- Light 60-70% of features, leaving some areas dark for contrast and mystery
- Space pools of light at least 20 feet apart so the eye moves naturally
- Build contrast between bright focal points and surrounding darkness
- Avoid the "airport runway" look of continuous, uniform path lighting
Knowing what to leave dark is as useful as choosing what to highlight.
Choosing the Right Bulbs: LED vs. Halogen
Bulb choice shapes how that restrained design feels at night. Modern LEDs have made halogen nearly obsolete for landscape lighting.
LED advantages:
- Lifespan: 50,000+ operating hours, translating to 15-25 years of typical evening use
- Energy efficiency: 75% less energy consumption than halogen
- Minimal heat: Better for plants and safer near combustible materials
- Durability: Solid-state design withstands vibration and impact
Color temperature guidance:
- 2700K-3000K: Warm, inviting ambiance ideal for traditional residential architecture, natural stone, wood, and warm-toned materials
- 3500K-4000K: Crisp, modern aesthetic for contemporary designs
Typical lumen starting points help size the job: path lights often land around 100–200 lumens, accent uplights around 150–400, and broader wash or security needs higher still. Adjustable-output fixtures make it easier to tune brightness as plants grow.
Fixture Concealment and Visual Hierarchy
Even well-chosen LEDs fall flat if the hardware steals attention. You should see the lighting effect, not the fixture.
Concealment techniques:
- Tuck uplights behind shrubs, groundcover, or garden features
- Bury path lights in low plantings to hide hardware
- Screen spotlights with foliage or place them in shadow zones
- Use low-profile, dark-finished fixtures that blend into surroundings
Build hierarchy the same way:
- Vary intensity for primary, secondary, and tertiary focal points
- Keep color temperature consistent within each zone
- Use brighter light on key features and softer light on supporting elements
- Guide the eye through the landscape in a planned sequence
Special Considerations for Historic DC Properties
Those same rules matter even more in Georgetown, Capitol Hill, and Cleveland Park, where row houses, Federal-style townhomes, and Victorian facades need a lighter touch.
Design approaches for historic homes:
- Highlight columns, cornices, and decorative brickwork without overwhelming the facade
- Use concealed fixtures and hidden wiring to preserve period aesthetics
- Work carefully around mature trees and established plantings common in older neighborhoods
- Choose warm 2700K LEDs that complement traditional materials
- Position fixtures at low angles to reveal texture in brick, stone, and masonry
On narrow urban lots, a focused three-fixture layout can still transform the property at night while protecting historic character. Landscape Lighting Designers Plus applies this low-voltage, restraint-first approach across DC metro homes where subtlety matters as much as coverage.

Professional Installation vs. DIY: What DC Metro Homeowners Need to Know
When DIY Installation Makes Sense
Simple, small-scale projects work well for homeowners comfortable with basic electrical concepts.
DIY-appropriate scenarios:
- Simple path lighting along a single walkway
- Small accent lighting project with 3-5 fixtures
- Single-zone systems with straightforward cable runs
- Properties without challenging terrain or extensive landscaping
Getting started: Begin with a focused project, such as driveway-to-front-door pathway lighting, to build confidence before attempting more complex designs.
When to Hire a Professional Designer and Installer
Hire a professional when your project involves:
- Multi-zone designs requiring multiple transformers and circuits
- Properties with challenging terrain, slopes, or extensive mature landscaping
- Historic architecture requiring sensitive fixture selection and placement
- Integration with smart-home or automated control systems
- A preference for artistic design expertise over kit-based generic layouts
The Value of Owner-Operated Expertise
Working directly with an experienced designer offers distinct advantages over large contractors who assign your project to sales reps and installation crews.
Owner-operated benefits:
- Direct communication with the person designing your system
- 21 years of DC metro experience with local architecture and landscape challenges
- Design-first artistic approach that treats lighting as an art form guided by balance, subtlety, and elegance
- Personal accountability throughout design, installation, and follow-up
At Landscape Lighting Designers Plus, Craig Collins personally designs every project in Bethesda, Potomac, Chevy Chase, and across the DC metro area. There are no project managers or sales reps in the middle.
Maintenance and Longevity Considerations for Outdoor Lighting
A well-designed low-voltage system can last for years, but dirt, plant growth, and weather still take a toll. A light maintenance routine protects performance and keeps the design looking intentional after dark.
Routine Care for Long-Lasting Performance
Core tasks most homeowners (or their lighting pro) should stay on top of:
- Clean fixture lenses and housings to remove dirt, debris, and spider webs
- Trim vegetation so growth does not block light or stress buried cables
- Re-aim fixtures seasonally as plants fill in
- Inspect connections and transformer terminals once a year
- Clear debris from in-ground well lights
An annual tune-up usually catches small issues before they become outages. Many homeowners schedule that check after the growing season, when aiming and connections need the most attention.
Troubleshooting Common Issues
Flickering lights: Start with wire connections and transformer voltage. Loose terminals are a frequent cause.
Dim fixtures: Often a voltage-drop problem on a long or overloaded cable run. A higher transformer tap, fewer fixtures on that run, or a larger wire gauge typically restores brightness—work a low-voltage specialist should confirm before you rewire.
Non-functioning lights: Verify the transformer and timer first, then check the lamp. If power is present, inspect the cable path for damage from digging or landscape work.
Choosing Durable, Weather-Resistant Fixtures
Match housing material to the site:
- Brass and copper — Excellent near water; develop an attractive patina over time
- Stainless steel — Strong corrosion resistance with a cleaner, modern look
- Powder-coated aluminum — Lightweight and cost-effective for general use away from coastal or constantly wet areas
IP ratings tell you how well a fixture seals out dust and water. For landscape work, IP67 and IP68 are the practical benchmarks for in-ground and wet locations.
On finish quality, look for 10–15 year warranties on brass, copper, and stainless housings. That coverage is a clearer durability signal than marketing claims alone.
Homeowners who want certainty before installation can preview their home at night with an on-site demonstration.
Frequently Asked Questions
What are the newest outdoor light trends?
Current trends include smart Wi-Fi systems with app control and scheduling, warm amber LEDs (2200K) for vintage looks and dark-sky compliance, and fixtures that blend into the architecture. Many designs also prioritize sustainability with targeted light and less spill.
What is the difference between low-voltage and line-voltage landscape lighting?
Low-voltage (12V) systems are safer, more energy-efficient, easier to install and modify, and rarely need permits. Line-voltage (120V) requires professional electrical work and permits and is mainly used when higher power is required. For residential properties, 12V is the professional standard.
How long do LED landscape lights last?
Quality LED landscape fixtures deliver 50,000+ operating hours, translating to 15-25 years of typical evening use with minimal brightness degradation. This far exceeds the 2-year lifespan of traditional halogen bulbs, reducing both maintenance hassle and long-term operating costs.
Can outdoor lighting increase my home's value?
Professional landscape lighting boosts curb appeal, extends outdoor living space, and improves perceived security—factors that influence how buyers see a home. It also gives homeowners immediate enjoyment and usable outdoor space after dark.
Do I need a permit for landscape lighting installation in Washington DC or Maryland?
Low-voltage (12V) landscape lighting typically does not require permits in most DC metro jurisdictions; some areas (such as Montgomery County, MD) have a simple process for systems at or below 50V. Line-voltage (120V) work usually needs an electrical permit. Always confirm with your local jurisdiction before starting.
How much does professional landscape lighting cost in the DC metro area?
Typical residential projects in the DC metro area range from about $3,000 for focused entry and pathway lighting to $15,000 or more for whole-property designs. Cost depends on property size, fixture count, and system complexity. A complimentary consultation and detailed quote clarify the investment before work begins.