DIY homeowners can handle solar, battery-powered, and plug-in fixtures with no electrical work. Those comfortable with household circuits can tackle hardwired 120V motion-sensor floodlights—provided they follow strict safety protocols, shut off power at the breaker, and verify circuits with a voltage tester. Integrated low-voltage landscape security lighting typically requires professional design and installation to achieve optimal safety, aesthetics, and electrical code compliance.
Poor installation carries real consequences: electrical shock or fire risk, inadequate coverage that leaves vulnerable dark spots, light trespass that angers neighbors, premature fixture failure from moisture intrusion, and voided warranties. This guide covers both DIY security lighting installation for standard motion-sensor floodlights and explains when professionally designed security lighting makes more sense for homeowners seeking integrated aesthetic and functional solutions.
Key Takeaways
- Solar skips wiring but runs dimmer; 120V floodlights need an electrician; low-voltage systems suit designed security lighting
- Confirm power sources, circuit capacity, tools, and local permits before you start
- Install in order: place fixtures, shut off power, mount, wire, weatherproof, then test and aim
- Call an electrician for complex 120V work; use a landscape lighting designer when security should also boost curb appeal
Understanding Your Security Lighting Options
"Security lighting" spans a wide spectrum, from basic utility floodlights mounted above your garage to professionally designed landscape lighting systems that blend safety with curb appeal. Each approach serves different budgets, skill levels, and aesthetic goals.
Standard Motion-Sensor Floodlights (120V Hardwired)
This is the most common DIY option: bright floodlights hardwired into your home's 120-volt electrical system, typically mounted above garages or near entry points. These fixtures deliver powerful illumination (often 1,700 to 4,100 lumens) triggered by motion sensors that detect movement and turn lights on automatically.
Key features include:
- Motion sensors with adjustable sensitivity and timer settings
- Photocells (dusk-to-dawn sensors) that activate only after sunset
- Wide coverage areas—some models offer 200-degree detection zones
- Bright output designed for maximum visibility
Pros:
- Strong visual deterrent with reliable hardwired power
- Wide coverage from a single fixture
- Affordable hardware ($30–$40 retail per fixture)
Cons:
- Harsh look that can hurt curb appeal
- Glare risk and possible neighbor complaints
- Utility-focused rather than design-integrated
Alternative Power Options (Solar, Battery, Plug-In)
Solar-powered security lights use photovoltaic panels to charge during the day and illuminate at night. They're ideal for locations without nearby electrical outlets: fence lines, remote shed areas, and pathways. Current retail examples include 1,000-lumen solar motion lights priced around $30–$35.
The trade-off: Solar and battery options eliminate wiring complexity, but they usually mean lower brightness, weaker performance in shade or winter, and periodic battery replacement.
Solar models need at least 6 hours of full sunlight daily. Without it, the battery gradually discharges and the light stops working.
Professional Low-Voltage Landscape Security Lighting (12V Systems)
Low-voltage systems operate at safer 12 volts through transformers. Landscape lighting specialists design and install them so security needs and aesthetic goals work together.
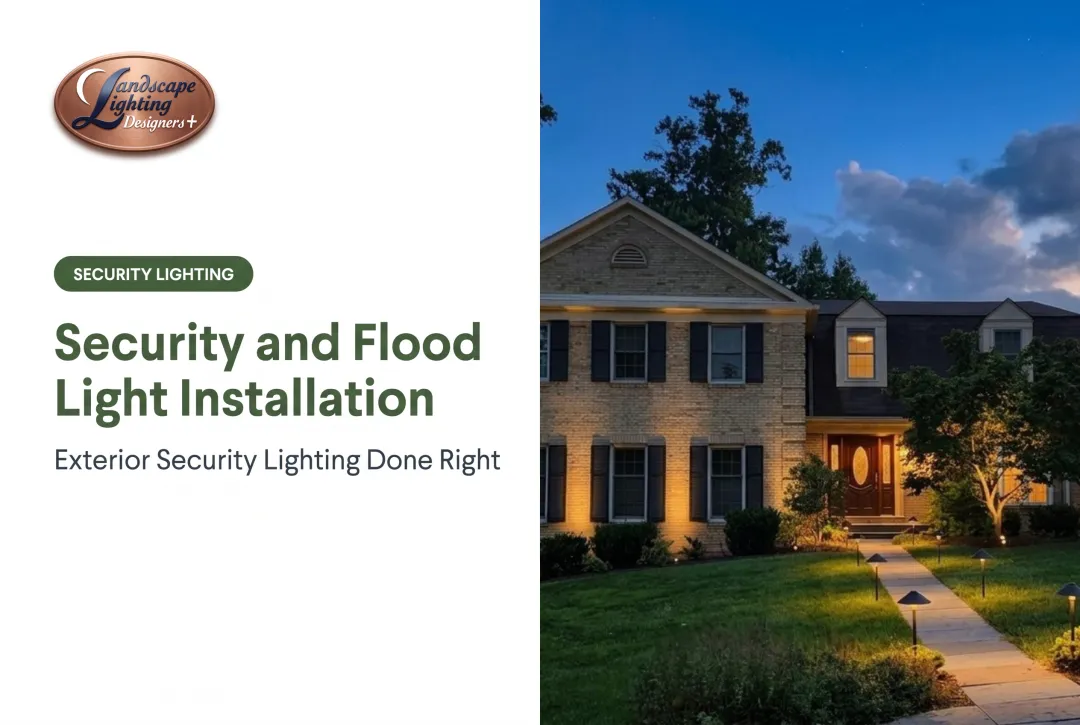
Rather than mounting a single harsh floodlight on your house, designers place fixtures throughout the landscape (along pathways, near plantings, and at property boundaries). Layered lighting removes dark hiding spots while keeping curb appeal intact day and night.
Design advantages:
- Fixtures can be placed strategically throughout the property, not just on the house
- Layered lighting provides both illumination and ambiance
- Emphasizes architectural features while eliminating shadows
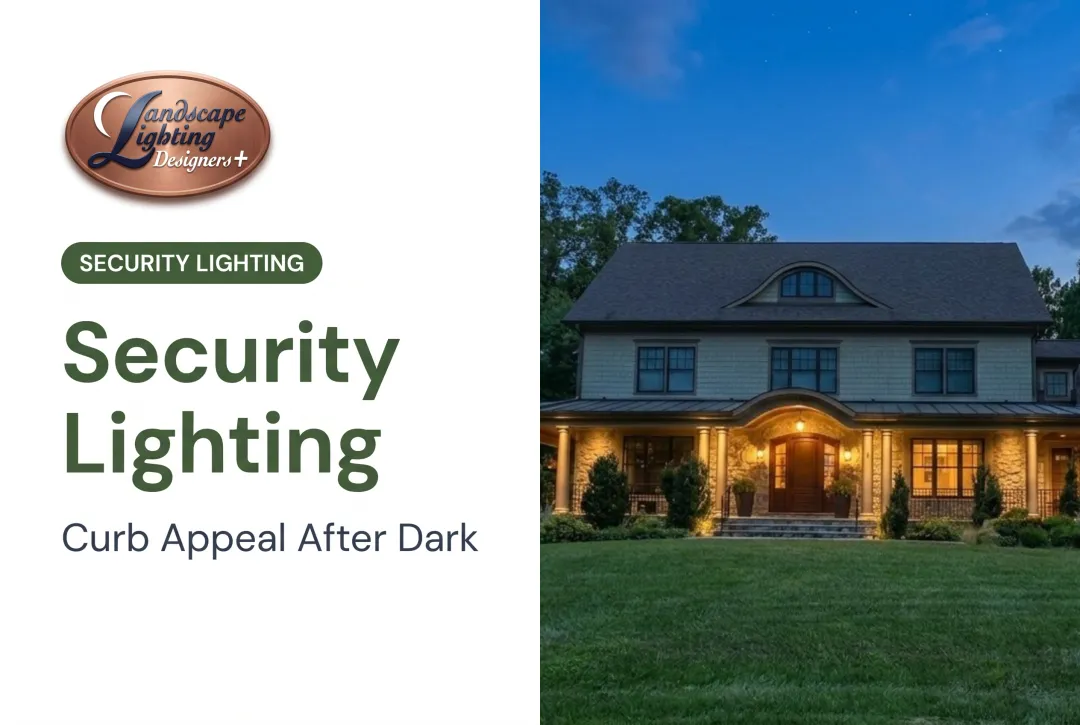
- Maintains elegant appearance that doesn't look like commercial security lighting
Professional design addresses Crime Prevention Through Environmental Design (CPTED) principles: consistent visibility, natural surveillance, and defined boundaries, without "fortress lighting" aesthetics. It requires specialized knowledge of fixture placement, beam angles, and integration with landscaping.
In the DC metro area, Landscape Lighting Designers Plus has spent over 21 years building this kind of integrated system for homeowners in Bethesda, Potomac, Chevy Chase, Rockville, and Washington DC. Owner Craig Collins personally designs each project with exclusively low-voltage 12V systems—especially useful on historic and architecturally distinctive homes where utility floodlights would undercut curb appeal.
Comparing Cost and Value
Approximate cost ranges:
- DIY hardwired floodlights: $30–$40 per fixture (retail product only; excludes tools, permits, wire, labor)
- Solar/battery options: $30–$35 per light (retail)
- DIY low-voltage project: $101–$250 for a small pathway system (Family Handyman benchmark)
- Professional low-voltage systems: $2,000–$6,000+ for comprehensive residential installation, depending on property size and design complexity
Value goes beyond the upfront price. Low-voltage LED systems use 80–90% less energy than traditional halogen lights. A 20-fixture LED installation draws roughly 200 watts total, versus 1,000–2,000 watts for equivalent halogens. That gap usually means only a few dollars per month in operating costs.
Professional-grade LED bulbs are rated for 25,000–50,000 hours, so replacements are rare. Thoughtful placement and brightness also support property value and cut light pollution.

Prerequisites and Safety Considerations for DIY Installation
Before attempting DIY hardwired security light installation, verify these prerequisites:
- Circuit breaker panel has capacity for the additional load (confirm with an electrician if uncertain)
- Access to an existing junction box or switch near the installation site
- Proper permits obtained if required by local code
Critical safety requirements:
- Shut off power at the circuit breaker before any electrical work
- Use a non-contact voltage tester to verify power is truly off; never rely on switches alone
- Test your voltage tester on a known live source before and after use to confirm it works
- Work during daylight hours for better visibility
- Use a sturdy ladder rated for your weight plus tools, set on stable, level ground
- Avoid working in wet conditions
- Wear rubber-soled shoes
Do not proceed with installation if:
- You cannot identify which circuit breaker controls the power source
- The existing circuit is already at capacity
- You are uncomfortable working with electrical wiring
- You need to run new circuits through walls (hire a licensed electrician)
- Local codes require a licensed electrician for exterior electrical work (verify with your jurisdiction)
Hardwired 120V work carries real electrical risk. If any item above gives you pause, stop and hire a licensed electrician. Low-voltage landscape security lighting is a common alternative that avoids line-voltage wiring altogether.
Tools and Materials Required
Low-voltage (12V) landscape security lighting uses a transformer, direct-burial cable, and ground- or structure-mounted fixtures—not 120V house wiring. A typical install kit looks like this:
Essential tools:
- Voltage tester or multimeter (confirm transformer output and connections)
- Wire strippers and cutters rated for landscape cable
- Screwdrivers (Phillips and flathead) plus nut drivers for mounts
- Spade, trenching shovel, or edger for shallow cable runs
- Rubber mallet for driving fixture stakes
- Ladder only if aiming or mounting on eaves, trees, or tall structures
Required materials:
- Low-voltage security and flood fixtures with stakes or mounting hardware
- Weatherproof magnetic transformer or LED driver sized for total fixture load
- Direct-burial landscape cable (commonly 12/2 or 8/2 low-voltage wire, per run length and load)
- Waterproof wire connectors (gel-filled or grease-filled landscape connectors)
- Landscape staples or clips to secure cable
- Electrical tape and exterior-grade sealant where cable enters a transformer or junction point
Optional but helpful:
- Cable puller or fish rods for tight beds and under-walk sleeves
- Stud finder or probe when fastening to wood structures
- Spare lamps or integrated-LED modules matched to your fixtures
- Headlamp for aiming and walk-throughs after dark

Step-by-Step Installation Guide for DIY Security Lights
Work in order—skipping steps causes rework, nuisance trips, or shock hazards. This sequence is for hardwired 120V motion-sensor floodlights only, not low-voltage landscape systems.
Step 1: Select Optimal Light Placement
- Mount 8–10 feet high for coverage (confirm height in your fixture manual)
- Place above or beside entries: garage doors, front doors, side gates
- Give the motion sensor a clear view of approach paths—clear eaves and vegetation
- Overlap coverage zones so you don’t leave dark gaps between fixtures
What to avoid:
- Aiming light into neighbors’ windows (light-trespass complaints)
- Mounting too low (easier to disable or vandalize)
- Sensors that see street traffic or moving branches (false triggers)
Step 2: Turn Off Power and Verify
- Find the breaker for the circuit you’ll tap
- Switch that breaker OFF
- Confirm dead power with a non-contact voltage tester at several points on the circuit
- Prove the tester on a known live outlet before and after you use it
Never touch wires until the tester reads dead. If you can’t identify the breaker, shut off the main and treat the whole panel as live until retested.
Step 3: Create Access Hole and Run Wiring
- From inside, drill through the exterior wall at the mount point with a spade bit sized for the cable
- Angle the hole slightly downward toward the exterior so water can’t run indoors
- Fish 14-gauge or 12-gauge cable from the power source to the exterior hole
- Leave 8–12 inches of slack at the interior box and at the exterior opening for connections
Step 4: Mount Fixture and Make Electrical Connections
Mounting:
- Fasten the mounting bracket to siding or fascia with hardware matched to the surface (lag screws for wood; masonry anchors for brick or stone)
- Level the bracket and snug it so it carries fixture weight and wind load
Wiring connections (follow manufacturer instructions):
- White (neutral) to white
- Black (hot) to black
- Bare copper or green (ground) to ground
- Cap each splice with a wire nut; add electrical tape if you want the nut locked in place
- Fold the splices into the junction box without pinching insulation
Separate sensor heads and multi-lead fixtures don’t always follow this map—match the manufacturer’s wiring diagram exactly.
Step 5: Weatherproof All Penetrations
Water at the penetrations is the usual reason these lights fail early—and it can corrode connections or create shock risk.
- Run a continuous bead of exterior-grade silicone where the base plate meets the siding
- Seal the cable entry into the wall
- Leave a small weep opening at the bottom of the base so condensation can drain
Step 6: Restore Power and Test Functionality
- Restore power at the breaker
- Turn the light on from the interior switch or control
- Confirm the lamp lights steadily
- Walk the detection zone at different angles and distances to test the sensor
Dial in the sensor (about 10–15 minutes):
- Sensitivity — how much movement triggers the light
- Range — how far the sensor “sees”
- Time delay — how long the light stays on after motion stops
Match settings to real traffic on your lot so porch use triggers the light and the street does not.

Installation checks out when:
- The light fires reliably inside your intended zone
- Street traffic and tree motion don’t keep tripping it
- Coverage hits the target area without harsh glare into windows
- The mount is tight and dry at every sealed joint
If you’re not licensed or comfortable in a 120V box—or you’d rather skip house wiring entirely—low-voltage landscape security lighting can cover paths and entries without tapping branch circuits. Local code and permit rules still apply either way; when in doubt, hire a qualified pro.
Post-Installation Checks and Validation
Before considering installation complete, perform these critical validation steps:
Visual inspection:
- Check fixture and transformer connections so contacts are tight, sealed, and free of exposed copper
- Verify fixture is securely mounted with no wobble or movement
- Confirm weatherproofing seals are continuous and low-voltage cable is protected where it enters the fixture
Functional testing:
- Test the motion sensor from the front, sides, and diagonal paths to confirm coverage matches your security zones
- Test at different times of day if fixture has dusk-to-dawn sensor to confirm photocell works properly
- Verify light output is adequate: you should clearly identify a person's features at 30+ feet
Indicators of incorrect installation:
- Light flickers or dims when the sensor activates (transformer overload or loose connections)
- Moisture accumulation inside fixture cover (inadequate weatherproofing)
- Motion sensor fails to detect movement in intended zones (improper aiming or sensitivity settings)
- Light triggers excessively from non-security sources like distant traffic or animals (needs sensitivity adjustment)
Once checks pass, fine-tune aiming and sensitivity so the light covers real approach paths without constant false triggers.
Common Installation Problems and Fixes
Most security lighting issues trace back to sensor aim, photocell setup, or weather sealing. Work through these checks before replacing hardware.
Problem 1: Motion Sensor Not Detecting Movement in Expected Zones
Likely causes:
- Sensor aimed too high, too low, or blocked by eaves or plants
- Sensitivity set too low
- Dirty sensor lens
Fixes:
- Adjust vertical and horizontal aim to cover real approach paths
- Raise sensitivity gradually and retest
- Clean the lens with a soft cloth
- Trim plants or clear anything blocking the sensor’s view
- Keep the sensor off heat sources like HVAC vents (false triggers on PIR sensors)
Problem 2: Light Turns On During Daytime or Won't Turn On at Night
Likely causes:
- Photocell blocked, dirty, or failing
- Photocell reading nearby artificial light (street lamps, porch lights)
Fixes:
- Confirm the photocell isn’t covered by the fixture or lit by nearby lamps
- Clean the photocell lens
- Check the maker’s guide for sensitivity adjustment
- Cover the photocell with black electrical tape to simulate dark and confirm the light turns on
Problem 3: Moisture or Condensation Visible Inside Fixture
Likely causes:
- Gaps in weatherproofing that let water in
- Normal condensation with poor ventilation or drainage
Fixes:
- Remove the fixture and inspect caulk/seals at the mount and wire entry
- Reapply weatherproof sealant in a continuous bead with no gaps
- Confirm weep holes at the bottom so condensation can drain
- Swap sealed, unvented fixtures for a better-ventilated model if fogging keeps returning
If aim, seals, and sensors check out and the problem continues, a low-voltage lighting pro can diagnose wiring, transformer load, and fixture placement on site.

When to Hire a Professional vs. DIY Approach
Hire a licensed electrician when:
- Installing a new dedicated circuit (new wire from the breaker panel through walls)
- Local codes require a licensed electrician for exterior electrical work
- Working with aluminum wiring (special techniques and connections)
- Existing wiring is damaged or does not meet current code
- You are uncomfortable working with electricity
Hardwired exterior work often needs a permit. In the DC metro area, requirements differ across D.C., Maryland, and Virginia, so check with your local authority having jurisdiction (AHJ) and confirm which edition of NFPA 70 (National Electrical Code) your area enforces.
Line-voltage house wiring is a different job from low-voltage landscape lighting. Many security lighting upgrades fall into the second category.
DIY can make sense when:
- You are adding or swapping plug-and-play or simple low-voltage fixtures on an existing system
- The run is short, accessible, and does not need new circuits or wall/ceiling fishing
- You only need basic path or entry light and accept a simpler layout
- You are comfortable following manufacturer instructions and local rules
Bring in a landscape lighting designer when:
- You want security lighting integrated with landscape design and architecture
- Historic or distinctive architecture would look wrong with standard floodlights
- You want layered light that covers security and curb appeal
- Light trespass, neighbor impact, or HOA rules are a concern
That is the gap Landscape Lighting Designers Plus fills for DC metro homeowners in Bethesda, Potomac, Chevy Chase, Rockville, and Washington, DC. Owner Craig Collins has designed low-voltage 12V systems for 21+ years, with a focus on historic and architecturally distinctive homes.
Instead of harsh house-mounted floods alone, he places fixtures along walkways, near plantings, and at property edges to cut dark hiding spots without washing out the facade. Motion-activated zones can cover side yards, garage approaches, and back gates, while the rest of the landscape stays warm and even.

Pro Tips for Effective Security Lighting
Use a layered lighting strategy
Skip the all-or-nothing floodlight approach. Blend ambient pathway light, soft accent light on landscape features, and motion-activated light at doors and gates.
You get fuller coverage at night, and the property still looks intentional when sensors kick on—not blasted with one harsh wash of light.
Optimal timing and placement
- Install security lights during construction or major renovations, when access is easier
- Keep motion sensors off HVAC exhausts, busy streets or sidewalks, and wind-moved trees
- Note which circuit or transformer feeds each light for faster troubleshooting later
Maintenance and adjustments
- Clean fixture lenses and photocell sensors twice a year
- Tighten mounting screws after the first winter (freeze-thaw cycles loosen hardware)
- Retune motion sensitivity when plant growth changes coverage zones
- Trim vegetation 2–3 feet back from fixtures to limit blockage and heat buildup
- Replace older halogen or incandescent security lamps with LEDs for the same brightness at 80–90% less energy use, and 25,000–50,000 hours of life versus 2–3 years for traditional bulbs
For visual reference, our portfolio of completed projects applies these techniques to DC-area houses of very different styles.
Frequently Asked Questions
How much does it cost to install outdoor security lighting?
DIY solar or battery motion lights cost about $30–$35 per fixture. Hardwired 120V floodlights run $30–$40 DIY, or roughly $200–$600 each installed. Professionally designed low-voltage landscape security systems typically range from $2,000–$6,000+ based on property size, fixture count, and design complexity.
Do you need an electrician to install outdoor security lighting?
It depends on the lighting type and local codes. Solar and battery-powered lights need no electrical work and are fully DIY-friendly. Hardwired 120V fixtures often require a licensed electrician—especially for new circuits, older wiring, or exterior work that needs inspection.
What is the difference between a floodlight and a security light?
A floodlight is a wide-beam, high-output fixture type. A security light is any light used to deter intruders and improve visibility. Most security setups use floodlights for coverage, but spotlights, path lights, and accent lights also work when placed to remove dark hiding spots.
What is the best placement for outdoor security lights?
Mount lights at entry points and home corners at 8–10 feet so they cover approach paths and two sides at once. Keep motion sensors clear of obstructions, and avoid glare into neighbors’ windows or false triggers from street traffic.
Can security lighting be both functional and attractive?
Yes. Layered low-voltage landscape lighting can secure a property without harsh utility floodlights. Fixtures in planting beds, along paths, and near focal points eliminate dark spots while highlighting architecture and preserving nighttime curb appeal.
How bright should outdoor security lights be?
Entry points usually need about 1,000–1,300 lumens per fixture. High-security spots like detached garages or side gates may need 1,700–4,100 lumens. Multiple moderate lights almost always beat one extremely bright floodlight that creates glare and wastes energy.